省エネ

Flutter、vue3修行中。

【PHP】【Atom】syntax check

こんにちは。
フリーランスになってから、コーポレートサイトの製作などもちょっとやったりしています。

とあるお客様がデザイン会社にHP作成のお見積もりを出したところ、
月々のサーバー代が1万以上になるとのことでもう少し費用を抑えたいとのこと。
私のところにお話がきた時に月々の費用を安く抑えられるようにしようということでお安いレンタルサーバーでのご提案をさせていただきました。

保守費用もなしにして、ある程度お客様自身で更新ができるようにしました。
(これは私自身も都度都度更新の依頼をされるのが嫌だったから。)

レンタルサーバーで使用できる言語は次の3つです。 * Ruby * Perl * PHP * Python

この中で、一番手軽かなと思ったPHPでの実装を決めました。

エディタはAtomを使っています。

しかし、PHPってエラーの場所がわかりにくい。
見つけるのに時間がかかるのは;のつけ忘れとか。

そこで、AtomPHP-linter。

atom.io

これをinstallすると、 f:id:qkuroneko:20180204164540p:plain

こんな感じでsyntaxエラーを教えてくれます。

便利ですね。 これで作業が捗りそうです。

【Go】database migration tool

qkuronekop.hatenablog.jp

こちらに引き続き、環境の構築をしているのでメモ的に残そうと思います。

Databaseはmysqlを使っていて、テーブルを作成するのにgooseを使っています。

bitbucket.org

こちらは、プロジェクトにimportしていないので、go getで別途取得します。

install

go get bitbucket.org/liamstask/goose/cmd/goose

.bash_profile

export PATH="$GOPATH/bin:$PATH"

これでgooseコマンドが使えるようになります。

$ goose

goose is a database migration management system for Go projects.

Usage:
    goose [options] <subcommand> [subcommand options]

Options:
  -env string
        which DB environment to use (default "development")
  -path string
        folder containing db info (default "db")
  -pgschema string
        which postgres-schema to migrate (default = none)

Commands:
    up         Migrate the DB to the most recent version available
    down       Roll back the version by 1
    redo       Re-run the latest migration
    status     dump the migration status for the current DB
    create     Create the scaffolding for a new migration
    dbversion  Print the current version of the database

Configuration

プロジェクトフォルダの下にdbというフォルダを作成します。 dbの下にdbconf.ymlファイルを作ります。

ファイルの中はこんな感じ。

# test:
#     driver: mysql
#     open: tcp:localhost:3306*[db_name]/[user_name]/[password]

development:
    driver: mymysql
    open: tcp:localhost:3306*[db_name]/[user_name]/[password]

# production:
#     driver: postgres
#     open: user=liam dbname=tester sslmode=verify-full

customimport:
    driver: customdriver
    open: customdriver open
    import: github.com/custom/driver
    dialect: mysql

environment_variable_config:
    driver: $DB_DRIVER
    open: $DATABASE_URL

今はdevelopmentしか使ってないです。

migrationファイル

goose create [マイグレーション名] sql でファイルを作成できます。

-- +goose Up
-- SQL in section 'Up' is executed when this migration is applied


-- +goose Down
-- SQL section 'Down' is executed when this migration is rolled back

中はただこれだけなので、ここにSQLを書いていきます。

例えばこんな感じ。

-- +goose Up
-- SQL in section 'Up' is executed when this migration is applied
CREATE TABLE IF NOT EXISTS sample (
  id INT NOT NULL AUTO_INCREMENT,
  name VARCHAR(255),
  update_at DATETIME,
  create_at DATETIME,
  PRIMARY KEY (id)
) ENGINE = InnoDB;

-- +goose Down
-- SQL section 'Down' is executed when this migration is rolled back
DROP TABLE sample;

UP

$ goose up
goose: migrating db environment 'development', current version: 20170923140458, target: 20180129163234
OK    20180129163234_sample.sql

できた。

DOWN

$ goose down
goose: migrating db environment 'development', current version: 20180129163234, target: 20170923140458
OK    20180129163234_sample.sql

簡単です。

【Go】開発環境を作る

こんにちは。 現在、とあるお客様のお仕事でGoでWebアプリを作らせていただいています。 新しいパソコンを購入したので、開発環境を作るところからもう一度やるので、せっかくだから残しておこうと思います

環境

HomebrewでGoのインストール

$ brew -v
Homebrew 1.5.0

$ brew install go
Updating Homebrew...
==> Auto-updated Homebrew!
Updated 1 tap (homebrew/core).
==> New Formulae
augustus         glances          hlint            hmmer            jdupes           libjwt           mmseqs2          mpir             skafos           vis
==> Updated Formulae

〜中略〜

==> Downloading https://homebrew.bintray.com/bottles/go-1.9.2.high_sierra.bottle.tar.gz
######################################################################## 100.0%
==> Pouring go-1.9.2.high_sierra.bottle.tar.gz
==> Caveats
A valid GOPATH is required to use the `go get` command.
If $GOPATH is not specified, $HOME/go will be used by default:
  https://golang.org/doc/code.html#GOPATH

You may wish to add the GOROOT-based install location to your PATH:
  export PATH=$PATH:/usr/local/opt/go/libexec/bin
==> Summary
🍺  /usr/local/Cellar/go/1.9.2: 7,646 files, 293.9MB

$ go version
go version go1.9.2 darwin/amd64

よさそう。 と、思ったけど。 ここまでやって、バージョン管理もしたいなって思い始めたので、goenv使います。

brew uninstall go
Uninstalling /usr/local/Cellar/go/1.9.2... (7,646 files, 293.9MB)

消す。

goenvインストール

gvmというバージョン管理ツールもあるようですが、goenvの方が簡単そうだったのとhomebrewでインストールできるのでこっちにしました。

$ brew install goenv
==> Downloading https://github.com/syndbg/goenv/archive/1.7.0.tar.gz
==> Downloading from https://codeload.github.com/syndbg/goenv/tar.gz/1.7.0
######################################################################## 100.0%
🍺  /usr/local/Cellar/goenv/1.7.0: 131 files, 234.5KB, built in 3 seconds

.bash_profileに以下を追記

export PATH="$HOME/.goenv/bin:$PATH"
eval "$(goenv init -)"
$ source ~/.bash_profile 

.bash_profileの再読み込み。

$ goenv
goenv 1.0.0
Usage: goenv <command> [<args>]

Some useful goenv commands are:
   commands    List all available commands of goenv
   local       Set or show the local application-specific Go version
   global      Set or show the global Go version
   shell       Set or show the shell-specific Go version
   install     Install a Go version using go-build
   uninstall   Uninstall a specific Go version
   rehash      Rehash goenv shims (run this after installing executables)
   version     Show the current Go version and its origin
   versions    List all Go versions available to goenv
   which       Display the full path to an executable
   whence      List all Go versions that contain the given executable

See `goenv help <command>' for information on a specific command.
For full documentation, see: https://github.com/syndbg/goenv#readme

はいった。 goenvのコマンド一覧。

Goのインストールと設定

$ goenv install -l
Available versions:
  1.2.2
  1.3.0
  1.3.1
  1.3.2
  1.3.3
  1.4.0
  1.4.1
  1.4.2
  1.4.3
  1.5.0
  1.5.1
  1.5.2
  1.5.3
  1.5.4
  1.6.0
  1.6.1
  1.6.2
  1.6.3
  1.6.4
  1.7.0
  1.7.1
  1.7.3
  1.7.4
  1.7.5
  1.8.0
  1.8.1
  1.8.3
  1.8.4
  1.8.5
  1.9.0
  1.9.1

インストール可能なバージョンの一覧が取得できる。

今動いているアプリは1.8だけどこの機会にバージョンを上げたいので一番新しいのにします。

$ goenv install 1.9.2

〜略〜

$ goenv versions
  1.9.2
$ cd projectdir
$ goenv local 1.9.2
$ go version
go version go1.9.2 darwin/amd64

gitで落としてきたディレクトリに移動して、使いたいバージョンを指定します。 今回はこのプロジェクトでのみ1.9.2を適用させたいのでlocalを使いました。

パッケージ管理

さて、すぐにでもgo run ~したいところですが、パッケージの管理もやってなかったのでこの機会にパッケージ管理もしたいと思います。

depインストール

パッケージの管理はdepを使います。

github.com

$ brew install dep
$ dep init
root project import: /Users/XXXXXX/Documents/go/projectdir is not within any GOPATH/src

何も考えずにdep initしたら怒られました。

GOPATHを設定

.bash_profileに以下を追加。

export GOPATH="/Users/XXXXXX/Documents/go"
GOPATH/src/projectdir

のように、プロジェクトディレクトリを配置する。 projectdirrootdep initする。

Gopkg.lockGopkg.tomlが作られる。

$ cat Gopkg.toml

# Gopkg.toml example
#
# Refer to https://github.com/golang/dep/blob/master/docs/Gopkg.toml.md
# for detailed Gopkg.toml documentation.
#
# required = ["github.com/user/thing/cmd/thing"]
# ignored = ["github.com/user/project/pkgX", "bitbucket.org/user/project/pkgA/pkgY"]
#
# [[constraint]]
#   name = "github.com/user/project"
#   version = "1.0.0"
#
# [[constraint]]
#   name = "github.com/user/project2"
#   branch = "dev"
#   source = "github.com/myfork/project2"
#
# [[override]]
#  name = "github.com/x/y"
#  version = "2.4.0"


[[constraint]]
  name = "github.com/cihub/seelog"
  version = "2.6.0"

[[constraint]]
  branch = "master"
  name = "github.com/gin-gonic/contrib"

[[constraint]]
  name = "github.com/gin-gonic/gin"
  version = "1.2.0"

[[constraint]]
  name = "github.com/go-sql-driver/mysql"
  version = "1.3.0"

[[constraint]]
  name = "gopkg.in/gomail.v2"
  version = "2.0.0"

使っているライブラリを自動で吐き出してくれる。 自動で作られたvendorというディレクトルにライブラリをインストールしてくれる。 とりあえず、すでにimportしてたやつはvendorにいれてくれたみたいです。

これで動かせる!

と、思ったらgomailのバージョンが変わってるのかundefined: gomail.NewDialerって言われてしまったので、ソースを直さなきゃですね。 では、環境構築はこの辺で。

2018/11/22追記

undefined: gomail.NewDialerが出てビルドできなかった件ですが、解決策が見つかりました。

Using dep with a project depending on "gomail" results in unbuildable package · Issue #777 · golang/dep · GitHub

吐き出したGopkg.tomlには

[[constraint]]
  name = "gopkg.in/gomail.v2"
  version = "2.0.0"

とあるのですが、これだとうまくいかないらしいのでbranchを指定します。

[[constraint]]
  name = "gopkg.in/gomail.v2"
  branch = "v2"

これに書き換えて、dep ensureしたら無事にビルド通りました。

【Ruby】bundle installに疲れた話

とある事情によりrailsの環境を作る必要があったので、 対象のリポジトリのREADMEに書かれた通りにインストールすることにしたのですが、 なんやかんやうまく行かなかったので残そうと思います。

READMEに書かれていたこと

  • rbenv install 2.3.1
  • gem install bunlder
  • bundle install

まあ、これだけなんですがこの3行を成功させる為に2時間くらいかかりました。

環境

MacOS(10.13.2)

rbenvのインストル

macは購入したばかりで何も入っていない状態でした。 rbenvをインストールする為にやったことは以下です。

ruby -e "$(curl -fsSL https://raw.githubusercontent.com/Homebrew/install/master/install)"
brew doctor
# Your system is ready to brew. (←これがでれば成功)
brew update
brew install rbenv

ここまではすんなり行きました。

ruby2.3.1のインストール

  • このプロジェクトでは2.3.1で動かしてねっていう規定があったのでこれをrbenvでインストール
rbenv versions
  system
* 2.3.1 (set by /Users/xxxxxx/.rbenv/version)

入ってるっぽい。

が、

ruby -v
ruby 2.3.3p222 (2016-11-21 revision 56859) [universal.x86_64-darwin17]

ってなる。

rbenvでインストールしたrubyが使われてないみたいですね。

rbenv local 2.3.1
rbenv rehash

ってしたけど状況変わらず。

rbenv init
# Load rbenv automatically by adding
# the following to ~/.bash_profile:

eval "$(rbenv init -)"

ってでるので、.bash_profileにeval "$(rbenv init -)"を追加。

ruby -v
ruby 2.3.1p112 (2016-04-26 revision 54768) [x86_64-darwin17]

良さそう。

bundle install

ここで、bundle installを叩くと。

Your Ruby version is 2.3.3, but your Gemfile specified 2.3.1

なんでじゃ。

which bundle
# /usr/local/bin/bundle

ローカルにbundlerが入ってないのが原因だったっぽいです。

sudo gem install bundler

でbundlerをインストール。

which bundle
# /Users/xxxxxx/.rbenv/shims/bundle

これでやっと、bundle installが叩けるようになりました。

まとめ

railsの環境を死ぬほど作ってきた人には簡単なんでしょうかね。 初心者にはきついです。 結局ローカルで動かすのに2時間くらいかかりました。 もっと簡単に環境が作れるといいのになー。 rbenv、プロジェクト毎にバージョンが変えられて便利なんでしょうが、 もちょっとよしなにやっていただきたいですね。 とにかく動いてよかったです。

【Android】GoogleMapApiを使ったのでログ

こんにちは。 今年最後のブログを書こうと思います。

12月中は常駐のお仕事を一旦お休みしてだらだら生活を送ろうと思ってたのに、 ひょんなことからGoogleMapを使うお仕事をいただいてしまったので、 結局キリキリ働いていました。

GoogleMapApiを使ったのでどんなことをしたかログを残そうと思います。

まずは導入。

1、Apiキーの取得

API キーの取得  |  Google Maps Android API  |  Google Developers

ここからApiキーを取得する必要があります。

2、アプリの設定。

一番簡単な方法は、Projectを作成する時にGoogleMapActivityを選択することですね。 これを選択してprojectを作ると下のコードは作成済みの状態になります。

f:id:qkuroneko:20171230111204p:plain

AndroidManifest.xml

    <meta-data
        android:name="com.google.android.geo.API_KEY"
        android:value="@string/google_maps_key"/>

Manifestの<application></application>に上のようにApiキーを設定します。

実際にMapが表示されるレイアウトはこんな感じです。

activity_map.xml

    <fragment
        android:id="@+id/map"
        android:name="com.google.android.gms.maps.SupportMapFragment"
        android:layout_width="match_parent"
        android:layout_height="match_parent"
        tools:context="com.linkbal.together.together_android.view.map.MapsActivity"
        />

今回はSupportMapFragmentを使いました。

MapActivity.kt

import android.support.v7.app.AppCompatActivity
import android.os.Bundle

import com.google.android.gms.maps.CameraUpdateFactory
import com.google.android.gms.maps.GoogleMap
import com.google.android.gms.maps.OnMapReadyCallback
import com.google.android.gms.maps.SupportMapFragment
import com.google.android.gms.maps.model.LatLng
import com.google.android.gms.maps.model.MarkerOptions

class MapActivity : AppCompatActivity(), OnMapReadyCallback {

    private lateinit var mMap: GoogleMap

    override fun onCreate(savedInstanceState: Bundle?) {
        super.onCreate(savedInstanceState)
        setContentView(R.layout.activity_maps)
        // Obtain the SupportMapFragment and get notified when the map is ready to be used.
        val mapFragment = supportFragmentManager
                .findFragmentById(R.id.map) as SupportMapFragment
        mapFragment.getMapAsync(this)
    }
    
    override fun onMapReady(googleMap: GoogleMap) {
        mMap = googleMap

        // Add a marker in Sydney and move the camera
        val sydney = LatLng(-34.0, 151.0)
        mMap.addMarker(MarkerOptions().position(sydney).title("Marker in Sydney"))
        mMap.moveCamera(CameraUpdateFactory.newLatLng(sydney))
    }
}

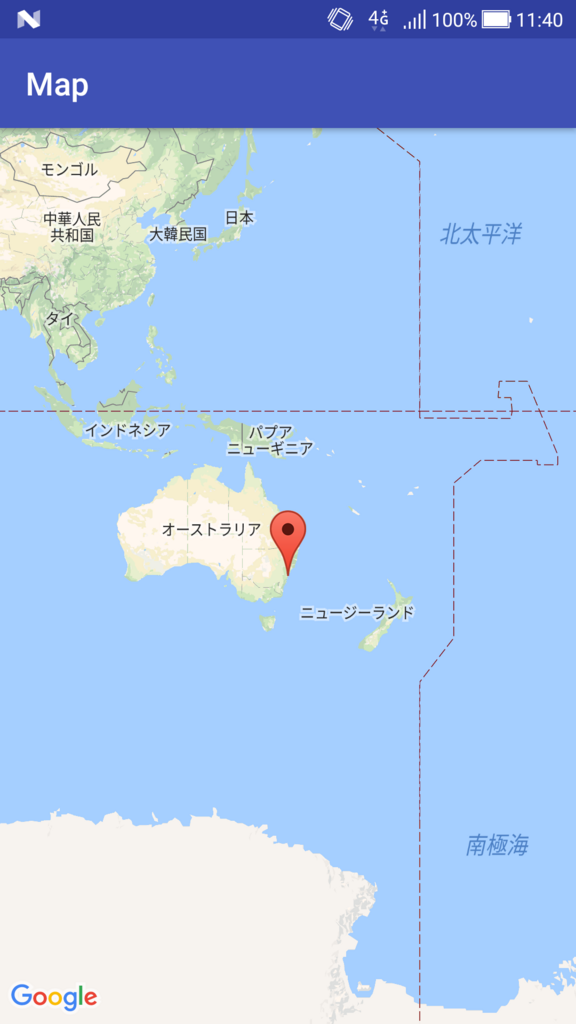
ここまでできたらもう地図を表示する事が可能です。

f:id:qkuroneko:20171230114120p:plain:w300

mMap.addMarker(MarkerOptions().position(sydney).title("Marker in Sydney")) これで、地図上にマーカーを追加する事ができます。 マーカーは複数追加できるみたいです。

mMap.moveCamera(CameraUpdateFactory.newLatLng(sydney)) これで、設定した位置情報が中心にくるようにカメラが移動します。

4、カスタマイズ

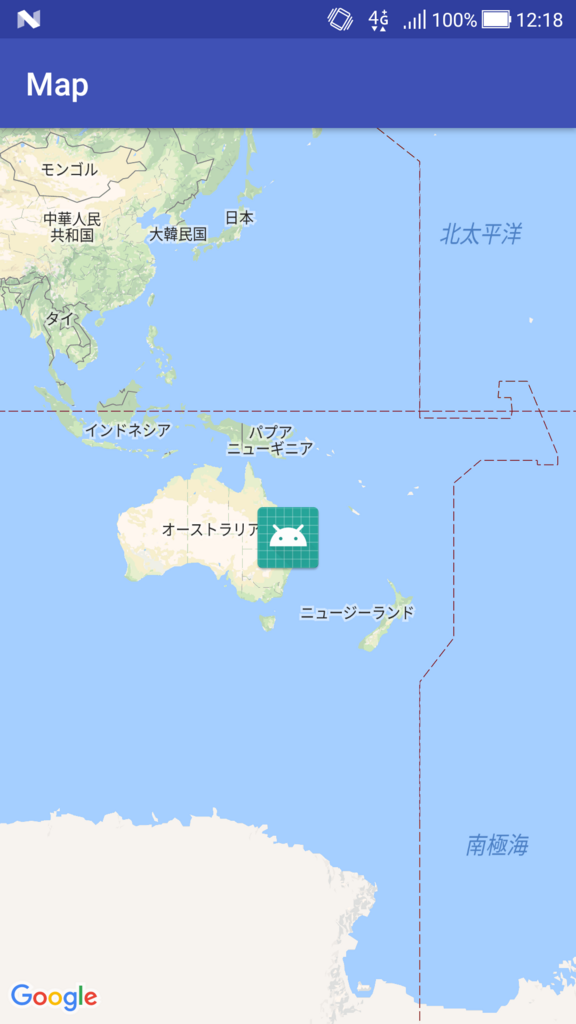
今回のお客様のご要望により、このマーカーを自分の用意した画像に変更したいとのことです。

こうします。

mMap.addMarker(MarkerOptions()
        .position(sydney)
        .icon(BitmapDescriptorFactory.fromResource(R.mipmap.ic_launcher))
        .title("Marker in Sydney")

.icon(BitmapDescriptorFactory.fromResource(R.mipmap.ic_launcher)) ここですね。

すると、ごらんの通り。

f:id:qkuroneko:20171230122025p:plain:w300

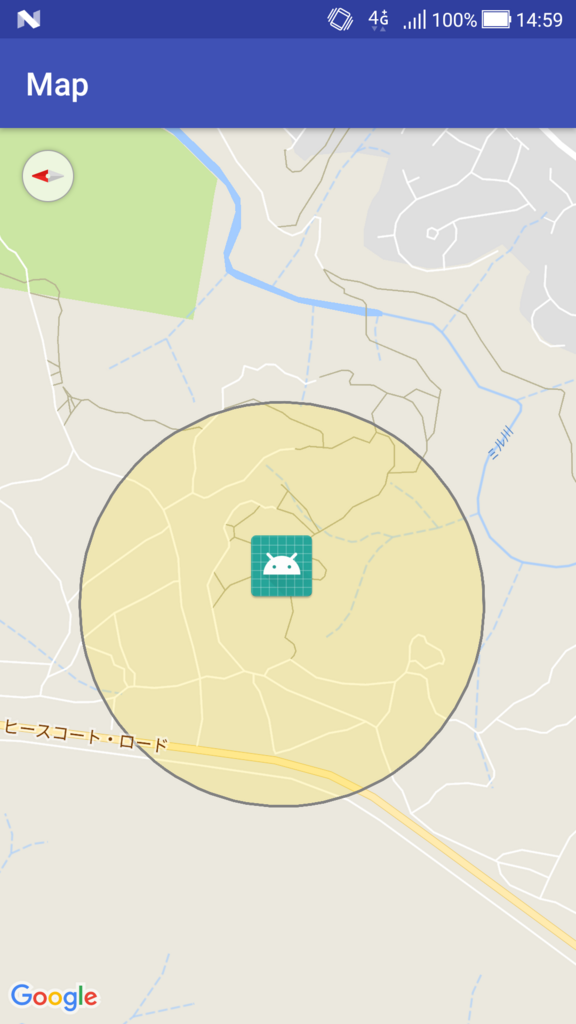
お次のご要望としては、1kmの円を描きたいとの事。

 mMap.addCircle(CircleOptions()
         .center(sydney)
         .radius(500.0)
         .strokeWidth(5f)
         .strokeColor(ContextCompat.getColor(applicationContext, R.color.colorCircleStroke))
         .fillColor(ContextCompat.getColor(applicationContext, R.color.colorCircleFill))
         .clickable(false)
)

こうします。

すると、こう。

f:id:qkuroneko:20171230150046p:plain:w300

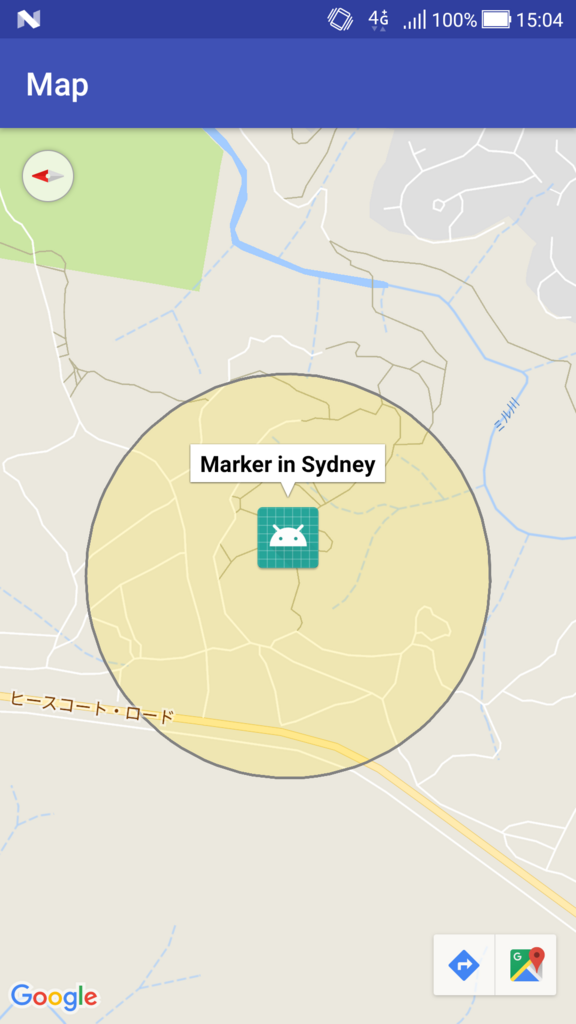
さて、このマーカーをタップした時の反応は、デフォルトだとこうなります。 .title("Marker in Sydney")に設定している文字が吹き出しで出てきます。

f:id:qkuroneko:20171230150442p:plain:w300

今回のご要望だと、ここをカスタマイズしたいとのこと。

そんなときはこうじゃっ!

class MapInfoAdapter : InfoWindowAdapter {

    override fun getInfoContents(marker: Marker?): View {
        TODO("not implemented") //To change body of created functions use File | Settings | File Templates.
    }

    override fun getInfoWindow(marker: Marker?): View {
        TODO("not implemented") //To change body of created functions use File | Settings | File Templates.
    }

}

InfoWindowAdapterを継承したadapterクラスを作ります。

ここにlayoutをinfrateすれば吹き出しをカスタマイズできます。 getInfoWindowは表示される枠全てがinfrateされます。 getInfoContentsは吹き出しの中だけがinftateされます。 デザインに合わせてどちらを使うかを決めてください。

mMap.setInfoWindowAdapter(MapInfoAdapter())

あとは、このadapterをsetするだけ。 簡単!

これくらいならApiの機能を使って簡単に実装できたのですが、 実際はもっと色々カスタマイズしたいとのご要望をいただいていて、 結構工夫を凝らさないとできない事があったのですが、 酔っ払ってきたのでこの辺で終わりにします。

また、年明けに続きを書くかもしれません。

それでは、良いお年を。

【Kotlin】Kotlin1.2がリリースされました!

Kotlin 1.2 リリース: プラットフォーム間のコード共有 | JetBrains ブログ

1.2のリリースでKotlinで書いたコードをJVMjavascript共用できる様になるらしいです。 AndroidとWebでデザインを似た様な感じにしておけば、 データを取ってくるロジックを使いまわすことができたりするかもですね。

一人でWebもNativeもやってる人には便利かもしれない。

今、一人で実装させてもらっている某社のお仕事で、 WebをGoで作ってしまったのですが、サーバーサイドもKotlinにすればよかったとちょっと後悔中です。

次回、Webのお仕事を貰えて、言語の選択ができるなら絶対Kotlinを選びますね。

以下、JETBRAINSブログより抜粋。 >GitHubオープンソースにおけるKotlinのコード行数は2千5百万行を超えました。StackOverflowでKotlinは一番成長している言語でかつ一番嫌われていない言語です。

凄く、重要な一文だと思いますので、ご紹介させていただきました。

以上です。

【Android】findViewByIdはもういらない、そうKotlinなら

kotlinlang.org

Kotlin Android Extensionsというプラグインがありまして、 これを使うとこんな書き方ができるようです。

activity_main.xml

<?xml version="1.0" encoding="utf-8"?>
<LinearLayout xmlns:android="http://schemas.android.com/apk/res/android"
    xmlns:tools="http://schemas.android.com/tools"
    android:layout_width="match_parent"
    android:layout_height="match_parent"
    tools:context="com.example.qkuronekop.sample02.MainActivity">

    <com.google.android.flexbox.FlexboxLayout
        android:id="@+id/flexLayout"
        android:layout_width="match_parent"
        android:layout_height="wrap_content"
        android:paddingLeft="16dp"
        android:paddingRight="16dp" />

</LinearLayout>

MainActivity.kt

package com.example.qkuronekop.sample02

import android.support.v7.app.AppCompatActivity
import android.os.Bundle
import android.widget.TextView
import kotlinx.android.synthetic.main.activity_main.*

class MainActivity : AppCompatActivity() {

    override fun onCreate(savedInstanceState: Bundle?) {
        super.onCreate(savedInstanceState)
        setContentView(R.layout.activity_main)
        (0..10).forEach {
            val textView = TextView(applicationContext).apply {
                text = "aaaaaa"
            }
            flexLayout.addView(textView)
        }

    }
}

こんな感じ。 ポイントはここ。

flexLayout.addView(textView)

xmlでつけてるidをそのまま使えます。 findViewByIdもキャストも不要でコードもスッキリです。

import kotlinx.android.synthetic.main.activity_main.*

ここを見ていただくとお分りのように、activity_mainをimportする必要がありますので、ご注意ください。

詳しい使い方は一番上にリンクした公式ページにて!