こんにちは。
前回、前々回と縦並び、横並びについて書いてきました。
↑Column()について。
↑Row()について。
本日はスクロールについて書いていきたいと思います。
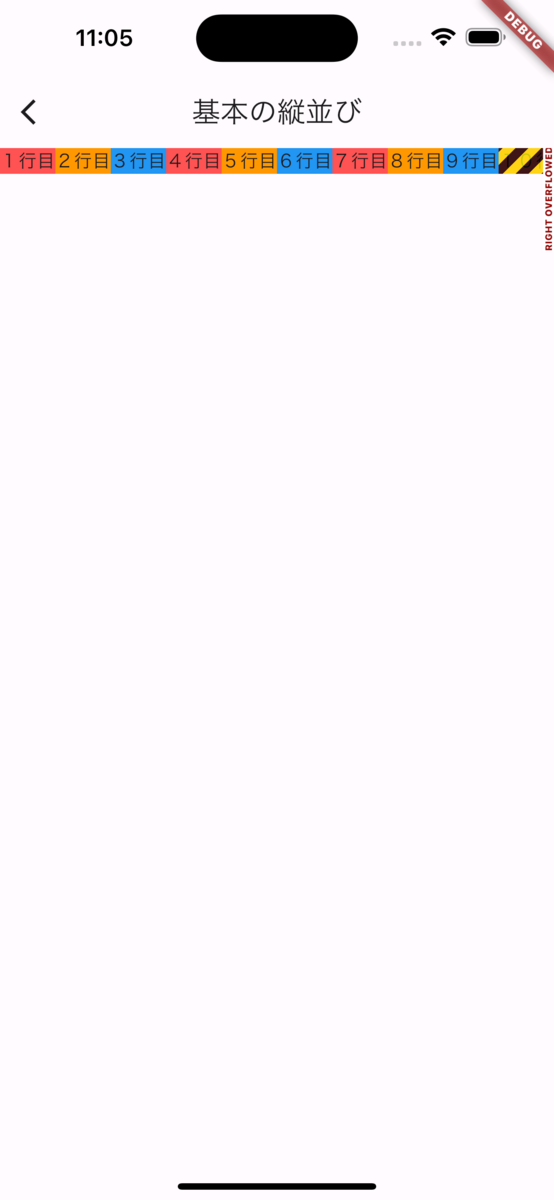
上の画像のように横に沢山要素を並べていくといずれはみ出します。
はみ出さずに沢山並べるにはどうしたらいいでしょうか?
そうです!
スクロールさせます。
Before
import 'package:flutter/material.dart';

class HomeScreen extends StatelessWidget {
  const HomeScreen({super.key});

  @override
  Widget build(BuildContext context) {
    return Scaffold(
      appBar: AppBar(
        title: const Text('基本の縦並び'),
      ),
      body: Container(
        width: double.infinity,
        color: Colors.yellow,
        child: const Row(
          children: [
            ColoredBox(
              color: Colors.redAccent,
              child: Text('1行目'),
            ),
            ColoredBox(
              color: Colors.orange,
              child: Text('2行目'),
            ),
            ColoredBox(
              color: Colors.blue,
              child: Text('3行目'),
            ),
            ColoredBox(
              color: Colors.redAccent,
              child: Text('4行目'),
            ),
            ColoredBox(
              color: Colors.orange,
              child: Text('5行目'),
            ),
            ColoredBox(
              color: Colors.blue,
              child: Text('6行目'),
            ),
            ColoredBox(
              color: Colors.redAccent,
              child: Text('7行目'),
            ),
            ColoredBox(
              color: Colors.orange,
              child: Text('8行目'),
            ),
            ColoredBox(
              color: Colors.blue,
              child: Text('9行目'),
            ),
            ColoredBox(
              color: Colors.redAccent,
              child: Text('10行目'),
            ),
            ColoredBox(
              color: Colors.orange,
              child: Text('11行目'),
            ),
            ColoredBox(
              color: Colors.blue,
              child: Text('12行目'),
            )
          ],
        ),
      ),
    );
  }
}
After
import 'package:flutter/material.dart';

class HomeScreen extends StatelessWidget {
  const HomeScreen({super.key});

  @override
  Widget build(BuildContext context) {
    return Scaffold(
      appBar: AppBar(
        title: const Text('基本の縦並び'),
      ),
      body: Container(
        width: double.infinity,
        color: Colors.yellow,
        child: const SingleChildScrollView(
          scrollDirection: Axis.horizontal,
          child: Row(
            children: [
              ColoredBox(
                color: Colors.redAccent,
                child: Text('1行目'),
              ),
              ColoredBox(
                color: Colors.orange,
                child: Text('2行目'),
              ),
              ColoredBox(
                color: Colors.blue,
                child: Text('3行目'),
              ),
              ColoredBox(
                color: Colors.redAccent,
                child: Text('4行目'),
              ),
              ColoredBox(
                color: Colors.orange,
                child: Text('5行目'),
              ),
              ColoredBox(
                color: Colors.blue,
                child: Text('6行目'),
              ),
              ColoredBox(
                color: Colors.redAccent,
                child: Text('7行目'),
              ),
              ColoredBox(
                color: Colors.orange,
                child: Text('8行目'),
              ),
              ColoredBox(
                color: Colors.blue,
                child: Text('9行目'),
              ),
              ColoredBox(
                color: Colors.redAccent,
                child: Text('10行目'),
              ),
              ColoredBox(
                color: Colors.orange,
                child: Text('11行目'),
              ),
              ColoredBox(
                color: Colors.blue,
                child: Text('12行目'),
              )
            ],
          ),
        ),
      ),
    );
  }
}
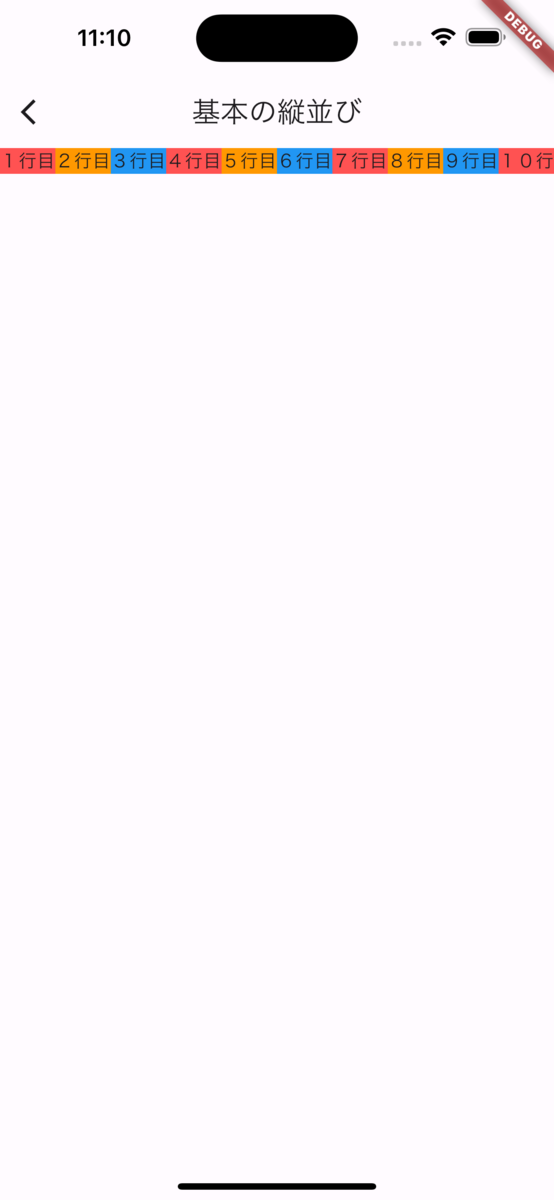
SingleChildScrollView() を入れた事によってはみ出す事がなくなりましたね。
scrollDirection: Axis.horizontal,とする事で横スクロールになります。
デフォルトは縦なので、縦方向にスクロールさせたい場合にはこの設定を消すか、scrollDirection: Axis.vertical,にしてください!
こんな時にもスクロール!
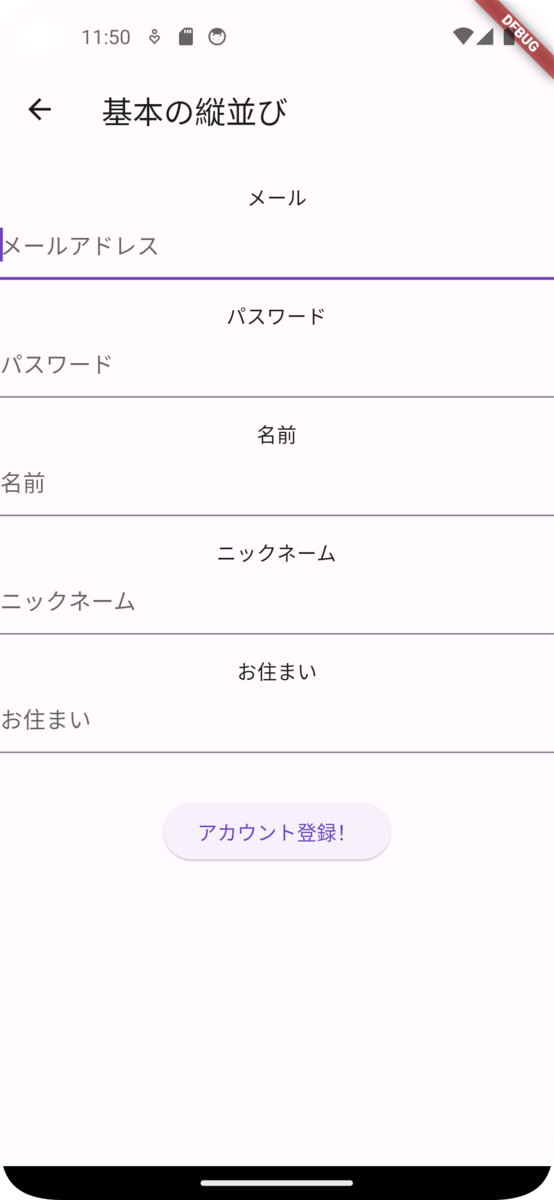
ログイン画面とかプロフィール入力画面とか、こんなのありそうですよね。
import 'package:flutter/material.dart';

class HomeScreen extends StatelessWidget {
  const HomeScreen({super.key});

  @override
  Widget build(BuildContext context) {
    return Scaffold(
      appBar: AppBar(
        title: const Text('基本の縦並び'),
      ),
      body: Column(
        children: [
          const SizedBox(
            height: 24,
          ),
          const Text('メール'),
          const TextField(
            decoration: InputDecoration(hintText: 'メールアドレス'),
          ),
          const SizedBox(
            height: 16,
          ),
          const Text('パスワード'),
          const TextField(
            decoration: InputDecoration(hintText: 'パスワード'),
          ),
          const SizedBox(
            height: 16,
          ),
          const Text('名前'),
          const TextField(
            decoration: InputDecoration(hintText: '名前'),
          ),
          const SizedBox(
            height: 16,
          ),
          const Text('ニックネーム'),
          const TextField(
            decoration: InputDecoration(hintText: 'ニックネーム'),
          ),
          const SizedBox(
            height: 16,
          ),
          const Text('お住まい'),
          const TextField(
            decoration: InputDecoration(hintText: 'お住まい'),
          ),
          const SizedBox(
            height: 32,
          ),
          ElevatedButton(onPressed: () {}, child: Text('アカウント登録!')),
        ],
      ),
    );
  }
}
一見画面内に収まっているように見えますが、

入力の為にキーボードが上がってくるとはみ出してしまいます。
なので、こうです。
import 'package:flutter/material.dart';

class HomeScreen extends StatelessWidget {
  const HomeScreen({super.key});

  @override
  Widget build(BuildContext context) {
    return Scaffold(
      appBar: AppBar(
        title: const Text('基本の縦並び'),
      ),
      body: SingleChildScrollView(
        child: Column(
          children: [
            const SizedBox(
              height: 24,
            ),
            const Text('メール'),
            const TextField(
              decoration: InputDecoration(hintText: 'メールアドレス'),
            ),
            const SizedBox(
              height: 16,
            ),
            const Text('パスワード'),
            const TextField(
              decoration: InputDecoration(hintText: 'パスワード'),
            ),
            const SizedBox(
              height: 16,
            ),
            const Text('名前'),
            const TextField(
              decoration: InputDecoration(hintText: '名前'),
            ),
            const SizedBox(
              height: 16,
            ),
            const Text('ニックネーム'),
            const TextField(
              decoration: InputDecoration(hintText: 'ニックネーム'),
            ),
            const SizedBox(
              height: 16,
            ),
            const Text('お住まい'),
            const TextField(
              decoration: InputDecoration(hintText: 'お住まい'),
            ),
            const SizedBox(
              height: 32,
            ),
            ElevatedButton(onPressed: () {}, child: Text('アカウント登録!')),
          ],
        ),
      ),
    );
  }
}
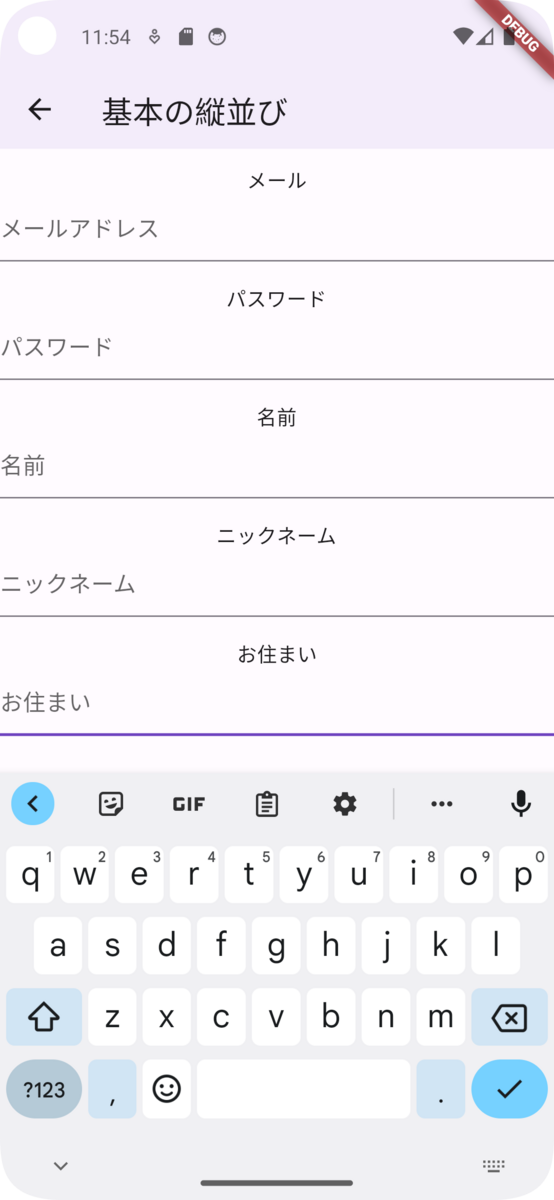
画面サイズとか色々あると思うので、小さい端末でもはみださないように入力のある画面にはスクロールを入れておくと安心です。
まとめ
スクロールの使い所、かがだったでしょうか?
これではみ出さないUIが作れる様になりましたね。
次回はスクロールつながりでListViewについて書いていきたいと思います。